Sitemap
Volkswagen ID.4 2021-2026 (E21) Owner's Manual
L Country-specific specifications
L Airbag label
L Memory buttons
L Front seat convenience entry function
L Limits of the radar sensor
L Limits in certain driving situations
L Charging with USB-C Connectors
L Wireless charging function
L Storage compartment cover
L Voice guidance
L Route plan
L Learning usage patterns
L When can the charging connector be released?
L Manual emergency release of the charging connector (variant 1)
L Manual emergency release of the charging connector (variant 2)
L High-voltage system fuse (emergency isolator)
L Preparations
L Jump-starting
L Removing the jumper cables
L Preparations
L Checking the coolant level
L Filling the coolant
L Preventing damage to the tires
L Recalibrating the Tire Pressure Monitoring System
L Data processing in the vehicle
L Operational data in the vehicle
L Cell phone integration
Volkswagen ID.4 (E21) 2021-2026 Service Manual
L General information - Body
L Welding crack up to length of 100 mm
L Welding tab
L Installation instructions for bonded windows and
glass panels
L Materials for bonded windows
L General body repairs, interior
L Overview of fitting locations - storage compartments/covers/trim panels
L Assembly overview dash panel cover on driver side
L Assembly overview - dash panel cover (passenger side)
L Assembly overview - glove compartment
L Removing and installing dash panel cover on driver side
L Removing and installing gap cover for dash panel insert
L Removing and installing lower steering column trim
L Removing and installing glove compartment with dash panel trim
L Removing and installing glove compartment cover
L Service position of glove compartment
L Assembly overview - net partition
L Removing and installing net partition bracket
L Removing and installing sun visor
L Removing and installing roof grab handle
L Assembly overview - centre console
L Removing and installing rear centre console trim
L Removing and installing centre console
L Removing and installing centre console bracket
L Removing and installing centre console side trim
L Assembly overview - interior mirror
L Removing and installing interior mirror
L Overview of fitting locations - seat belts and anchorage points
L Assembly overview front three-point seat belt
L Assembly overview rear outer three-point seat belt
L Assembly overview front belt buckle
L Removing and installing front three-point seat belt [NX10]/[NX11]
L Removing and installing rear three-point seat belt
L Removing and installing rear belt guide
L Removing and installing front belt end fitting
L Removing and installing rear outer belt end fitting
L Removing and installing front belt buckle
L Removing and installing rear belt buckle
L Assembly overview front child seat anchors
L Assembly overview - rear child seat anchors
L Removing and installing front child seat anchors
L Removing and installing airbag unit with igniter
L Renewing connector on airbag
L Assembly overview - front passenger airbag
L Removing and installing front passenger airbag unit with igniter
L Removing and installing key-operated switch to deactivate airbag on front
passenger side [E224]
L Assembly overview front side airbag, outer side
L Assembly overview - front side airbag, inner side
L Removing and installing front outer side airbag
L Removing and installing front inner side airbag
L Assembly overview - curtain airbag
L Removing and installing curtain airbag with igniter
L Assembly overview - crash sensors for airbags
L Removing and installing crash sensor for front airbag [G283]/[G284]
L Removing and installing front side airbag crash sensor [G179/G180]
L Removing and installing rear side airbag crash sensor [G256/G257]
L Removing and installing crash sensor for side airbag in B-pillar
[G1101/G1102]
L Assembly overview - seat occupied sensor
L Removing and installing rear seat occupied sensor [G177/G178/G1010]
L Overview of fitting locations - seat occupied recognition
L Removing and installing seat occupied recognition control unit [J706]
L Assembly overview - front door trim
L Removing and installing front door trim
L Removing and installing button trim
L Assembly overview - rear door trim
L Removing and installing rear door trim
L Assembly overview - dash panel
L Removing and installing dash panel trim
L Removing and installing dash panel
L Removing and installing side defroster vent
L Assembly overview central tube for dash panel
L Assembly overview impact damper and glove compartment bracket
L Removing and installing dash panel cross member
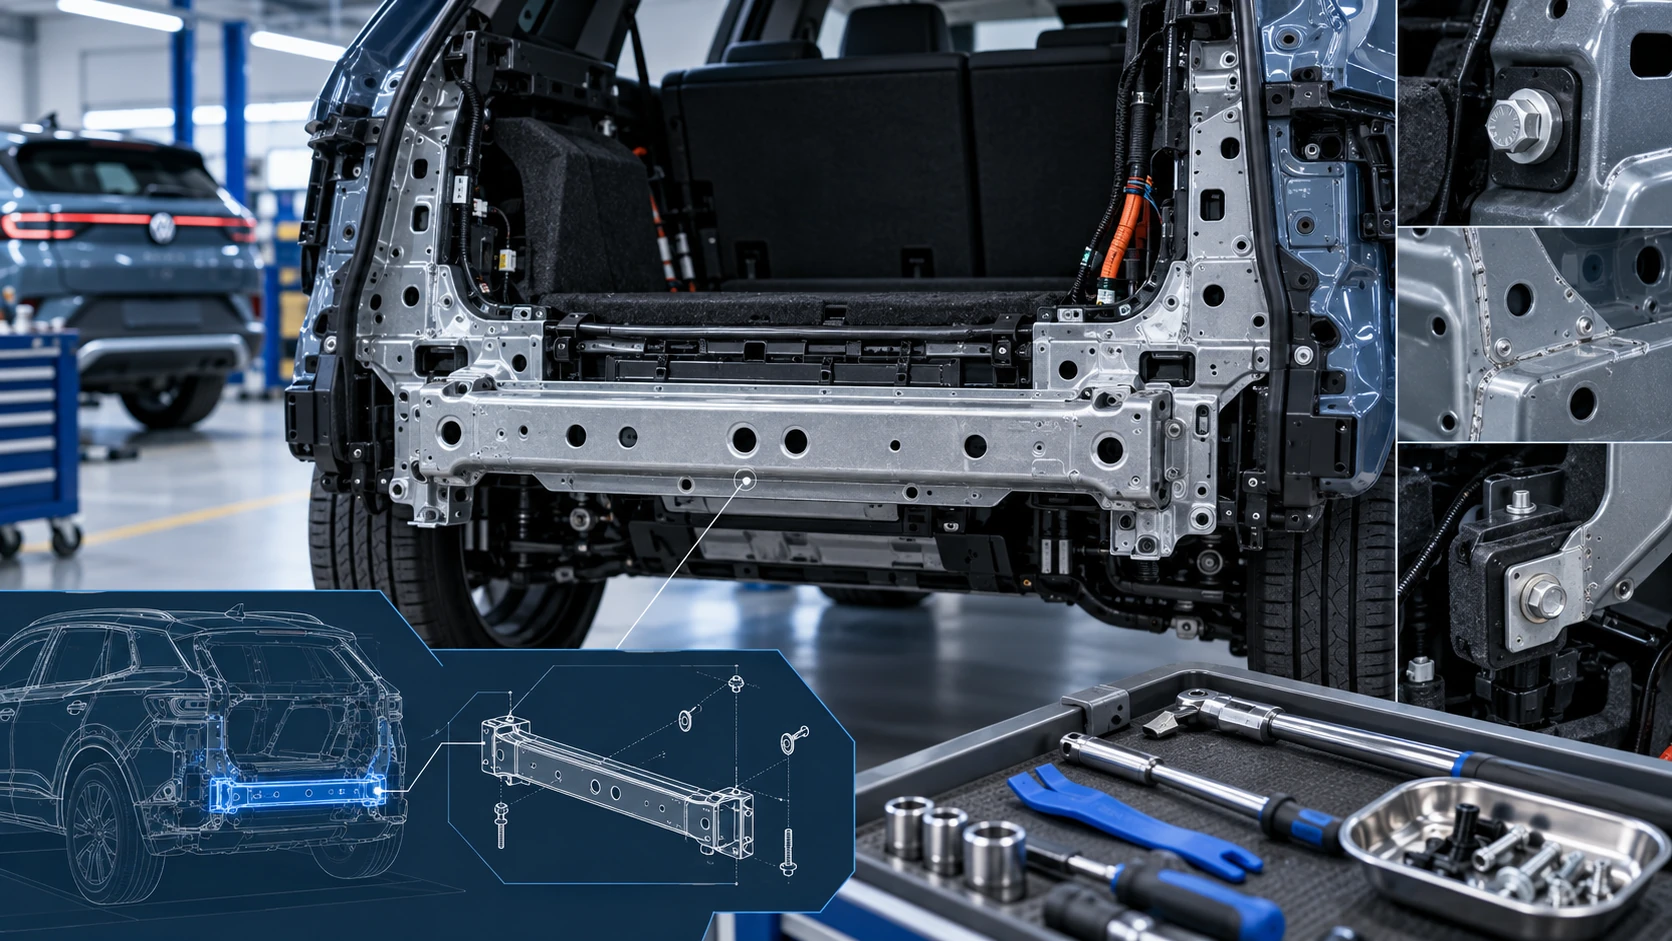
L Removing and installing crash bar
L Removing and installing impact absorber
L Overview of fitting locations - interior trims
L Assembly overview - sill panel moulding
L Assembly overview - A-pillar trim
L Assembly overview - B-pillar trim
L Assembly overview - C-pillar trim
L Removing and installing front sill panel moulding
L Removing and installing rear sill panel moulding
L Removing and installing upper A-pillar trim
L Removing and installing lower A-pillar trim
L Removing and installing upper B-pillar trim
L Removing and installing lower B-pillar trim
L Removing and installing C-pillar trim
L Removing and installing floor covering
L Overview of fitting locations - luggage compartment trims
L Assembly overview - luggage compartment side trim
L Assembly overview - lower rear lid trim
L Removing and installing lower rear lid trim
L Removing and installing luggage compartment side trim
L Removing and installing side rear lid trim
L Assembly overview moulded headliner
L Removing and installing moulded headliner
L Installing roof reinforcement to body
L Overview of fitting locations electrical and electronic components
L Assembly overview front seat
L Assembly overview - front backrest
L Assembly overview - head restraint
L Assembly overview seat pan
L Assembly overview seat height adjustment
L Assembly overview lumbar support
L Removing and installing front seat
L Removing and installing trim for backrest with integrated head restraint
L Removing and installing seat height adjuster
L Removing and installing head restraint
L Removing and installing head restraint
L Removing and installing head restraint guide
L Removing and installing lumbar support adjustment switch [E176]/[E177]
L Removing and installing lumbar support
L Removing and installing bracket for seat trim
L Removing and installing outer seat trim
L Removing and installing seat depth adjuster
L Removing and installing seat adjustment control unit
L Removing and installing wiring harness for seat frame
L Assembly overview - bench seat/individual seats
L Assembly overview - rear seat backrest
L Assembly overview - centre armrest
L Removing and installing bench seat/individual seats
L Removing and installing seat pan
L Removing and installing head restraint guide
L Removing and installing rear seat backrest
L Removing and installing back panel trim
L Removing and installing trim for locking mechanism
L Removing and installing trim frame for load-through hatch
L Removing and installing flap for load-through hatch
L Assembly overview seat pan cover and padding
L Assembly overview backrest cover and padding
L Assembly overview backrest heating element
L Removing and installing seat pan cover and padding
L Removing and installing backrest cover and padding
L Separating seat pan cover from seat pan padding
L Separating backrest cover from backrest padding
L Removing and installing seat heating element [ZX11]/[ZX13]
L Removing and installing backrest heating element [Z116]/[Z117]
L Assembly overview - rear bench seat cover and padding
L Assembly overview - rear seat backrest cover and
padding
L Removing and installing cover and padding of rear bench seat
L Removing and installing cover and padding of rear seat backrest
L Separating rear bench seat cover from padding
L Separating rear seat backrest cover from padding
L General body repairs, exterior
L Assembly overview - lock carrier
L Removing and installing lock carrier
L Removing and installing lock carrier brace
L Removing and installing lock carrier support
L Removing and installing headlight mounting
L Assembly overview wing
L Removing and installing wing
L Removing and installing end plate
L Removing and installing wing bracket
L Removing and installing bracket for deformation element
L Heating, air conditioning system
L Overview of fitting locations - components not located in vehicle
interior
L Overview of fitting locations - components not located in vehicle interior
L Overview of fitting locations - components not located in vehicle interior
L Overview of fitting locations - components in vehicle interior
L System overview - refrigerant circuit
L Assembly overview - refrigerant lines
L Assembly overview - heat exchanger for high-voltage battery
L Assembly overview - condenser
L Removing and installing refrigerant pressure and temperature sender [G395]
L Removing and installing pressure sender for refrigerant circuit G805
L Detaching and attaching refrigerant line at expansion valve
L Removing and installing desiccant bag
L Removing and installing evacuating and charging valve (low-pressure and
high-pressure sides)
L Removing and installing refrigerant expansion valve 1 N636
L Removing and installing heat exchanger for high-voltage battery
L Removing and installing refrigerant shut-off valve for heater and air
conditioner unit [N541], left-hand drive vehicles
L Removing and installing refrigerant shut-off valve for heater and air
conditioning unit N541 - right-hand drive vehicles
L Removing and installing refrigerant lines
L Removing and installing refrigerant line from condenser to air conditioner
compressor [VX81]
L Removing and installing refrigerant line from heat exchanger for
high-voltage battery to high-pressure line
L Removing and installing refrigerant line from heat exchanger for
high-voltage battery to low-pressure line
L Detaching and attaching refrigerant lines at condenser
L Cleaning refrigerant circuit
L System overview - refrigerant circuit
L Assembly overview - refrigerant lines
L Removing and installing refrigerant pressure and temperature sender G395
L Removing and installing gas cooler
L Removing and installing dryer in receiver
L Removing and installing evacuating and charging valve (low-pressure and
high-pressure
sides)
L Removing and installing refrigerant pressure and temperature sender 2 G826
L Removing and installing refrigerant pressure and temperature sender 3 G827
L Removing and installing refrigerant pressure and temperature sender 5 [G829]
L Removing and installing pressure limiting valve
L Removing and installing heat exchanger for high-voltage battery
L Removing and installing refrigerant lines
L Removing and installing refrigerant line between refrigerant shut-off valve
3 N641 and heat condenser
L Removing and installing refrigerant line between expansion valve N638/N637
and evaporator
L Removing and installing refrigerant line between heat pump valve unit and
evaporator
L Removing and installing refrigerant line between expansion valve N636/N696
and heat condenser
L Disconnecting and connecting refrigerant lines on gas cooler
L Cleaning refrigerant circuit
L Assembly overview - heat pump valve unit
L Removing and installing heat pump valve unit
L Removing and installing refrigerant expansion valve 1 N636
L Removing and installing refrigerant expansion valve 2 N637
L Removing and installing refrigerant shut-off valve 2 [N640]
L Removing and installing refrigerant shut-off valve 4 [N642]
L Assembly overview - air conditioner compressor
L Detaching and attaching refrigerant lines at air conditioner compressor
L Detaching/attaching air conditioner compressor [VX81] from/to bracket
L Assembly overview - air conditioner compressor
L Detaching and attaching refrigerant lines at air conditioner compressor
L Removing and installing air conditioner compressor [VX81]
L Overview of fitting locations - control motors (front)
L Exploded view - control motors (front)
L Removing and installing control motor for front left temperature flap
[VX34], LHD vehicles
L Removing and installing control motor for front left temperature flap
[VX34], right-hand drive vehicles
L Removing and installing control motor for front right temperature flap
[VX35], left-hand drive vehicles
L Removing and installing control motor for front right temperature flap
[VX35], right-hand drive vehicles
L Removing and installing control motor for defroster flap VX47
L Removing and installing control motor for front left air distribution flap
[VX93], left-hand drive vehicles
L Removing and installing control motor for front left air distribution flap
[VX93], right-hand drive vehicles
L Removing and installing control motor for front right air distribution flap
[VX94], left-hand drive vehicles
L Removing and installing control motor for front right air distribution flap
[VX94], right-hand drive vehicles
L Removing and installing control motor for fresh air and air recirculation
flap [VX96]
L Removing and installing actuator for left air distribution flap
L Overview of fitting locations - control motors (front)
L Exploded view - control motors (front)
L Removing and installing control motor for front left temperature flap
[VX34], LHD vehicles
L Removing and installing control motor for front left temperature flap
[VX34], right-hand drive vehicles
L Removing and installing control motor for front right temperature flap
[VX35], left-hand drive vehicles
L Removing and installing control motor for front right temperature flap
[VX35], right-hand drive vehicles
L Removing and installing control motor for defroster flap VX47
L Removing and installing control motor for front left air distribution flap
[VX93], left-hand drive vehicles
L Removing and installing control motor for front left air distribution flap
[VX93], right-hand drive vehicles
L Removing and installing control motor for front right air distribution
flap [VX94], left-hand drive vehicles
L Removing and installing control motor for front right air distribution
flap [VX94], right-hand drive vehicles
L Removing and installing control motor for rear temperature flap [VX95]
L Removing and installing control motor for fresh air and air recirculation
flap [VX96]
L Removing and installing actuator for left air distribution flap
L Removing and installing right air distribution flap actuator
L Assembly overview - heater and air conditioning unit
L Assembly overview - evaporator housing
L Assembly overview - air intake box of heater and air conditioning unit
L Removing and installing heater and air conditioning unit
L Removing and installing evaporator
L Removing and installing dust and pollen filter
L Removing and installing fresh air blower control unit [J126]
L Removing and installing condensation drain
L Removing and installing air intake box of heater and air conditioning unit
L Removing and installing air intake cowling
L Removing and installing high voltage heater (PTC) [ZX17]
L Assembly overview - heater and air conditioning unit
L Assembly overview - air intake box of heater and air conditioning unit
L Removing and installing heater and air conditioning unit
L Removing and installing dust and pollen filter
L Removing and installing fresh air blower control unit [J126]
L Removing and installing condensation drain
L Removing and installing air intake box of heater and air conditioning unit
L Removing and installing air intake cowling
L Removing and installing high voltage heater (PTC) [ZX17]
L Assembly overview - air ducts and air distribution in passenger compartment
L Removing and installing driver side footwell vents, left-hand drive vehicles
L Removing and installing front passenger side footwell vents, right-hand
drive vehicles
L Removing and installing air duct for centre dash panel vent
L Assembly overview - high-voltage heater (PTC)
L Removing and installing PTC heater element 3 [Z132]
L Assembly overview - high-voltage heater (PTC)
L Removing and installing PTC heater element 3 [Z132]
L Removing and installing external air quality and air humidity
sensor G935
L Removing and installing left vent temperature sender [G150], left-hand drive
vehicles
L Removing and installing left footwell vent temperature sender [G261]
L Removing and installing heater and air conditioning system control unit
[J979]
L Brake system
L Assembly overview - control unit and hydraulic unit
L Removing and installing ABS control unit [J104]/ABS hydraulic unit [N55]
L Removing and installing ABS control unit [J104]/ABS hydraulic unit [N55],
right-hand drive vehicles
L Connecting brake lines to hydraulic unit, left-hand drive vehicles
L Connecting brake lines to hydraulic unit, right-hand drive vehicles
L Assembly overview - speed sensor on front axle /on
rear axle
L Removing and installing speed sensor on front axle [G45]/[G47]
L Removing and installing speed sensor on rear axle [G44]/[G46]
L Assembly overview - front brake
L Removing and installing brake pads
L Removing and installing brake caliper
L Removing and installing brake disc
L Assembly overview - rear brake, drum brake version
L Assembly overview - brake shoes
L Removing and installing brake backplate
L Removing and installing gasket for brake backplate
L Removing and installing brake drum
L Removing and installing brake shoes
L Assembly overview - parking brake
L Removing and installing parking brake motor [V282]/[V283]
L Assembly overview - brake pedal
L Separating brake pedal from and joining to brake servo
L Removing and installing brake pedal
L Removing and installing mounting bracket
L Assembly overview - brake servo/brake master cylinder
L Removing and installing brake master cylinder
L Removing and installing brake servo
L Removing and installing brake servo [NX6], right-hand drive vehicles
L Bleeding hydraulic system
L Bleeding hydraulic system (additional bleeding procedure)
L Checking wheel brake cylinder for leaks
L Driver assist systems
L Overview of fitting locations - senders, sensors and control units, ID.4
L Overview of fitting locations - senders, sensors and control units, ID.5
L Removing and installing front parking aid senders
[G252]/[G253]/[G254]/[G255]
L Removing and installing rear parking aid senders [G203]/[G204]/[G205]/[G206]
L Removing and installing front park assist steering senders [G568]/[G569]
L Removing and installing rear park assist steering senders [G716]/[G717]
L Removing and installing adaptive cruise control unit [J428]
L Removing and installing control unit for overhead view camera [J928]
L Removing and installing left/right overhead view
camera R244/R245
L Removing and installing parking aid control unit
[J446]
L Removing and installing reversing camera [R189]
L Necessity of calibration
L Adjusting/calibrating adaptive cruise control unit
L Calibrating front camera for driver assist systems R242, dynamic
L Calibrating front camera for driver assist systems R242, static
L General information - high-voltage
L General information about packaging
high-voltage batteries
L Packaging high-voltage batteries in genuine part crate
L Packing defective high-voltage batteries
with "normal" status, module
L Packaging critical high-voltage batteries with "Warning" status - module
L Packaging critical high-voltage batteries with
"Warning" status, MEB batteries
L Assembly overview - bulkhead
L Removing and installing bulkhead
L Removing and installing plenum chamber cover
L Assembly overview - bonnet
L Assembly overview - Bowden cable
L Removing and installing bonnet
L Adjusting hinges
L Adjusting striker pin
L Adjusting bonnet lock
L Removing and installing striker pin
L Removing and installing Bowden cable
L Removing and installing bonnet stay
L Assembly overview - rear lid
L Assembly overview - rear lid power opening
L Removing and installing rear lid
L Adjusting rear lid
L Adjusting adjusting buffer at side
L Removing and installing power latching for rear lid [VX16]
L Removing and installing Bowden cable for power latching system
L Removing and installing rear lid handle
L Removing and installing adjusting buffer at bottom
L Removing and installing rear lid seal at roof channel
L Removing and installing gas strut
L Removing and installing rear lid drive unit [VX69]/[VX77]
L Removing and installing rear lid power opening senders [G750]/[G760]
L Removing and installing rear lid lock unit [VX25]
L Removing and installing rear lid power opening control unit [J938]
L Removing and installing hinge, double threaded connection
L Removing and installing rear lid control unit [J605]
L Assembly overview - charging flap unit
L Removing and installing charging flap unit
L Removing and installing charging flap
L Assembly overview - door
L Removing and installing inner door seal
L Removing and installing outer door seal
L Removing and installing door
L Adjusting door
L Adjusting striker pin
L Removing and installing door hinge
L Removing and installing door arrester
L Assembly overview - door components
L Assembly overview - assembly carrier
L Assembly overview - door handle and door lock
L Removing and installing noise insulation for inner side of outer door panel
L Removing and installing window regulator motor [V147]/[V148]
L Removing and installing striker pin
L Removing and installing exterior door handle [EX6]/[EX7]
L Dismantling and assembling exterior door handle [EX6]/[EX7]
L Removing and installing mounting bracket
L Removing and installing lock unit [VX21]/[VX22]
L Removing and installing assembly carrier
L Removing and installing window channel
L Removing and installing window slot inner seal
L Removing and installing window slot outer seal
L Removing and installing cap on door handle
L Removing and installing operating cable for exterior door handle
L Removing and installing operating cable for interior door handle
L Overview of fitting locations - central locking system
L Removing and installing door control unit [J386]/[J387]
L Removing and installing rear door control unit [J926]/[J927]
L Assembly overview - door
L Assembly overview - door seals
L Removing and installing door
L Adjusting door
L Adjusting striker pin
L Removing and installing door hinge
L Removing and installing outer door seal
L Removing and installing inner door seal
L Assembly overview - door components
L Assembly overview - assembly carrier
L Assembly overview - door handle and door lock
L Removing and installing rear window regulator motor [V471]/[V472]
L Removing and installing rear exterior door handle [EX8]/[EX9]
L Dismantling and assembling rear exterior door handle [EX8]/[EX9]
L Removing and installing mounting bracket
L Removing and installing rear door lock unit [VX83]/[VX84]
L Removing and installing assembly carrier
L Removing and installing window channel
L Removing and installing outer window slot seal
L Removing and installing window slot inner seal
L Removing and installing operating cable for exterior door handle
L Removing and installing operating cable for interior door handle
L Assembly overview - sun blind
L Removing and installing glass panel
L Removing and installing frame with sun blind
L Removing and installing sun blind
L Removing and installing sun blind drive unit VX455
L Removing and installing sun blind cables
L Assembly overview - water drain hoses
L Removing and installing water drain hose mounting
L Removing and installing water drain hoses
L Assembly overview - bumper cover
L Assembly overview - bumper carrier
L Assembly overview - attachments
L Removing and installing bumper cover
L Moving bumper carrier to and back from service position
L Removing and installing bumper carrier
L Removing and installing radar sensor cover
L Removing and installing air inlet trim
L Removing and installing bracket for front spoiler
L Removing and installing bumper cover reinforcement, GTX
L Removing and installing skid plate, GTX
L Removing and installing spoiler strip
L Removing and installing trim
L Installing holder for park assist steering sender
L Removing and installing towing eye cap, one-piece design
L Removing and installing number plate carrier, version 1
L Removing and installing number plate carrier, version 2
L Assembly overview - bumper cover
L Assembly overview - attachments
L Removing and installing bumper cover
L Removing and installing base plate for bumper cover
L Removing and installing bottom section of bumper cover
L Installing holder for park assist steering sender
L Installing number plate
L Removing and installing forced ventilation for passenger compartment
L Assembly overview - windscreen
L Removing and installing windscreen
L Assembly overview - rear window
L Removing and installing rear window
L Assembly overview - rear side window
L Removing and installing rear side window
L Assembly overview - rear door window
L Removing and installing rear door window
L Removing and installing front door window
L Removing and installing rear door window
L Removing and installing fixed rear door window
L Assembly overview - spoiler
L Removing and installing side spoiler
L Removing and installing spoiler trim
L Removing and installing spoiler trim carrier
L Assembly overview - covers
L Assembly overview - side member trim
L Assembly overview - C-pillar trim
L Removing and installing step moulding
L Removing and installing side member trim
L Removing and installing retaining strip
L Removing and installing A-pillar cover
L Removing and installing B-pillar trim on door
L Removing and installing trim panel for C-pillar
L Removing and installing front wheel arch cover
L Removing and installing wing cover
L Removing and installing rear wheel arch cover
L Removing and installing trim cover for front door
L Removing and installing trim cover for rear door
L Removing and installing trim cover for rear door, GTX
L Assembly overview - underbody cladding, 55, 62 kWh
L Assembly overview - underbody cladding, 82 kWh
L Assembly overview - underbody cladding, 82 kWh, GTX
L Removing and installing high-voltage battery skid plate, 55, 62 kWh
L Removing and installing high-voltage battery skid plate, 82 kWh
L Removing and installing side underbody cladding, 82 kWh
L Removing and installing rear underbody cladding
L Removing and installing underbody towing eye
L Removing and installing power unit skid plate
L Assembly overview roof railing
L Removing and installing roof rail
L Removing and installing roof trim strip
L Assembly overview - exterior mirror
L Removing and installing exterior mirror [VX4]/[VX5]
L Removing and installing mirror glass
L Removing and installing mirror adjustment unit
L Removing and installing lower mirror cover
L Removing and installing mirror trim
L Assembly overview - front wheel housing liner
L Assembly overview - rear wheel housing liner
L Removing and installing rear wheel housing liner
L Removing and installing side member trim
L Assembly overview - lettering and badges
L Removing and installing front badge
L Renewing lettering and badges on sides
L Removing and installing lettering at rear
L Removing and installing badge at rear
L Removing and installing trailer detector control unit [J345]
L Hinged towing bracket [VX15]
L Towing bracket with mounting for trailer coupling ball head
L Body repairs
L Vehicle identification number
L Type plate
L Moulded foam inserts
L Galvanized body parts, high/highest strength and hot-formed body panels
L Assembly overview - upper inner longitudinal member
L Renewing front left longitudinal member, part section (2nd separating cut)
L Renewing front right longitudinal member, part section
L Renewing front right longitudinal member, part section (second separating
cut)
L Renewing upper longitudinal member
L Renewing upper inner longitudinal member
L Assembly overview - front wheel housing
L Renewing front wheel housing
L Renewing front wheel housing (part section)
L Assembly overview - vehicle without glass panel
L Assembly overview - roof side member
L Renewing roof - vehicle without glass panel
L Renewing roof - vehicle with glass panel
L Renewing roof side member
L Assembly overview - A-pillar
L Renewing A-pillar
L Renewing A-pillar reinforcement, part section
L Assembly overview - B-pillar
L Renewing B-pillar
L Renewing B-pillar reinforcement
L Assembly overview - outer side member
L Assembly overview - side member reinforcement
L Renewing outer side member
L Renewing side member reinforcement
L Renewing side member reinforcement (crash bar)
L Assembly overview - sealing channel support
L Assembly overview - centre luggage compartment floor
L Assembly overview - luggage compartment floor cross member
L Renewing floor panel reinforcement
L Renewing centre luggage compartment floor
L Renewing rear luggage compartment floor
L Renewing luggage compartment floor cross member
L Assembly overview - longitudinal member cover plate
L Assembly overview - rear longitudinal member, part section (second
separating cut)
L Renewing rear longitudinal member, part section
L Renewing rear longitudinal member, part section (second parting cut)
L Assembly overview - side panel
L Renewing side panel, part section
L 1-speed gearbox 0MJB, front, EQ151
L 1-speed gearbox 0MH, rear, EQ310
L Vehicle-specific paint information
L Communication
L Removing and installing control unit for front display and information
control panel [J685]
L Control unit 1 for information electronics [J794]
L Removing and installing front bass loudspeakers
L Removing and installing rear bass loudspeakers
L Removing and installing digital sound package control unit [J525]
L Removing and installing frequency modulation (FM) frequency filters
[R178]/[R179]
L Removing and installing LTE aerial
L Removing and installing aerial amplifier for mobile telephone [R86]
L Removing and installing multifunction buttons [E440]/[E441]
L Removing and installing control unit for steering wheel contact detection
[J1158]
L Removing and installing emergency call module control unit and
communication unit [J949], rear bench seat
L Removing and installing loudspeaker for emergency call module [R335]
L Removing and installing emergency battery, telematics [A16]
L Electric drive EIP220, EIA200, EIA210
L Assembly overview - front motor
L Removing front motor
L Securing motor to engine and gearbox support, front motor
L Installing front motor
L Assembly overview - rear motor
L Removing rear motor
L Securing motor to engine and gearbox support, rear motor
L Installing rear motor
L Assembly overview - rear motor
L Removing rear motor
L Installing rear motor
L Connection diagram - coolant hoses, refrigerant R744
L Connection diagram - coolant hoses, refrigerant R1234yf
L Overview of fitting locations - cooling system, rear-wheel drive
L Overview of fitting locations - cooling system, all-wheel drive
L Assembly overview - cooling system, rear-wheel drive
L Assembly overview - cooling system, all-wheel drive
L Checking cooling system for leaks
L Removing and installing coolant expansion tank
L Checking filling quality
L Draining coolant
L Filling cooling system
L Assembly overview - electric coolant pump
L Assembly overview - coolant valves
L Exploded view - coolant temperature senders
L Removing and installing coolant pump for high-voltage battery [V590],
rear-wheel drive
L Removing and installing coolant pump for high-voltage battery [V590],
all-wheel drive
L Removing and installing coolant pump for low-temperature circuit [V468]
L Removing and installing mixing valve for high-voltage battery pre-heating,
rear-wheel drive
L Removing and installing mixing valve for high-voltage battery pre-heating,
all-wheel drive
L Removing and installing mixing valve 2 for high-voltage battery [V696]
pre-heating, heat
pump
L Removing and installing temperature sensor [G18]
L Removing and installing coolant temperature sender 1 for high-voltage
battery G898
L Removing and installing coolant temperature sender 2 for high-voltage
battery G899
L Assembly overview - radiator/radiator fan
L Removing and installing radiator module
L Dismantling and assembling radiator module
L Removing and installing radiator cowl with radiator fan
L Removing and installing control motor for radiator roller blind [V711], ID.3
L Removing and installing control motor for radiator roller blind [V711], ID.4
L Overview of fitting locations - high-voltage components, all-wheel drive
L Overview of fitting locations - high-voltage components, rear-wheel drive
L Overview of fitting locations - high-voltage components, all-wheel
drive
L Overview of fitting locations - high-voltage components, rear-wheel
drive
L Checking warning stickers
L Checking warning stickers
L Assembly overview - high-voltage battery, installed, 48, 55, 62 kWh
L Assembly overview - high-voltage battery, installed, 82 kWh
L Inspecting and classifying high-voltage battery 1 AX2
L Diagnosis of high-voltage battery 1 [AX2]
L Removing and installing high-voltage battery 1 [AX2], 48, 55, 62 kWh
L Removing and installing high-voltage battery 1 [AX2], 82 kWh
L Raising high-voltage battery 1 [AX2]
L Opening high-voltage battery 1 AX2
L Sealing high-voltage battery 1 [AX2], 48, 55, 62 kWh
L Sealing high-voltage battery 1 [AX2], 82 kWh
L Voltage and insulation measurement, 48, 55, 62 kWh
L Voltage and insulation measurement, 82 kWh
L Opening electrical circuit, 48, 55 kWh
L Opening electrical circuit, 62 kWh
L Opening electrical circuit, 82 kWh
L Removing and installing battery regulation control unit J840
L Charging and discharging battery modules
L Checking whether upper part of battery housing can be reused
L Renewing lower part of battery housing
L Renewing high-voltage battery 1 [AX2]
L Overview of fitting locations - battery modules, 48, 55 kWh
L Overview of fitting locations - battery modules, 62 kWh
L Overview of fitting locations - battery modules, 82 kWh
L Overview of fitting locations - battery connectors
L Assembly overview - high-voltage battery, removed, 82 kWh
L Assembly overview - switching unit for high-voltage battery, 48, 55, 62 kWh
L Assembly overview - switching unit for high-voltage battery, 82 kWh
L Assembly overview - high-voltage battery, connecting element, 48, 55, 62 kWh
L Assembly overview - high-voltage battery, connecting element, 82 kWh
L Removing battery module
L Installing battery module
L Removing and installing battery modules control unit
L Removing and installing connecting element, 48, 55 kWh
L Removing and installing connecting element, 62 kWh
L Removing and installing connecting element, 82 kWh
L Assembly overview - high-voltage battery, installed, 48, 55, 62 kWh
L Assembly overview - high-voltage battery, installed, 82 kWh
L Inspecting and classifying high-voltage battery 1 AX2
L Checking high-voltage battery for leaks
L Removing and installing high-voltage battery 1 [AX2], 48, 55, 62 kWh
L Removing and installing high-voltage battery 1 [AX2], 82 kWh
L h3 {color: blue;}
h4 {color: #FF00FF;}
L Raising high-voltage battery 1 [AX2]
L Opening high-voltage battery 1 AX2
L Sealing high-voltage battery 1 [AX2], 48, 55, 62 kWh
L Sealing high-voltage battery 1 [AX2], 82 kWh
L Voltage and insulation measurement, 48, 55, 62 kWh
L Voltage and insulation measurement, 82 kWh
L Opening electrical circuit, 48, 55 kWh
L Opening electrical circuit, 62 kWh
L Opening electrical circuit, 82 kWh
L Removing and installing battery regulation control unit J840
L Checking whether upper part of battery housing can be reused
L Renewing lower part of battery housing
L Overview of fitting locations - battery modules, 48, 55 kWh
L Overview of fitting locations - battery modules, 62 kWh
L Overview of fitting locations - battery modules, 82 kWh
L Assembly overview - high-voltage battery, removed, 48, 55, 62 kWh
L Assembly overview - high-voltage battery, removed, 82 kWh
L Assembly overview - battery modules
L Assembly overview - switching unit for high-voltage battery, 48, 55, 62 kWh
L Assembly overview - switching unit for high-voltage battery, 82 kWh
L Assembly overview - high-voltage battery, connecting element, 48, 55, 62 kWh
L Assembly overview - high-voltage battery, connecting element, 82 kWh
L Removing battery module
L Installing battery module
L Removing and installing battery modules control unit
L Removing and installing connecting element, 48, 55 kWh
L Removing and installing connecting element, 62 kWh
L Removing and installing connecting element, 82 kWh
L Assembly overview - power and control electronics for electric drive, front
L Removing and installing power and control electronics for electric drive,
front
L Leakage test of electric drive motor, rear
L Assembly overview - electric drive motor, rear
L Assembly overview - electric drive motor, front
L Removing and installing drive motor rotor position sender 1 [G713]
L Removing and installing drive motor rotor position sender, front
L Overview of fitting locations - potential equalisation lines, all-wheel
drive
L Overview of fitting locations - potential equalisation lines, rear-wheel
drive
L Assembly overview - charging socket
L Removing and installing high-voltage battery charging socket 1 [UX4]
L Removing and installing actuator for high-voltage charging socket lock 1
[F498]
L Assembly overview - charging socket
L Removing and installing high-voltage battery charging socket 1 [UX4]
L Removing and installing actuator for high-voltage charging socket lock 1
[F498]
L Assembly overview - charging unit for high-voltage battery, rear-wheel drive
L Assembly overview - charging unit for high-voltage battery, all-wheel drive
L Removing and installing charging unit 1 for high-voltage battery [AX4],
rear-wheel drive
L Removing and installing charging unit 1 for high-voltage battery [AX4],
all-wheel drive
L Assembly overview - charging unit for high-voltage battery
L Removing and installing charging unit 1 for high-voltage battery AX4
L Overview of fitting locations - driving sound/motor sound
L Removing and installing engine sound generator module 1 [RX21] / module 2
[RX22]
L Assembly overview - voltage converter, rear-wheel drive
L Assembly overview - voltage converter, all-wheel drive
L Removing and installing voltage converter, rear-wheel drive
L Removing and installing voltage converter, all-wheel drive
L Overview of fitting locations - high-voltage wires, charging unit,
high-voltage battery,
charging socket
L Overview of fitting locations - high-voltage wiring, electric drive control
units, high-voltage
battery
L Overview of fitting locations - high-voltage wires, voltage converter,
high-voltage heater, air
conditioner compressor, all-wheel drive
L Removing and installing high-voltage wiring harness for power and control
electronics for
electric drive
L Removing and installing high-voltage wiring harness for high-voltage heater
L Removing and installing high-voltage wiring harness for voltage converter,
high-voltage
heater, air conditioner compressor
L Unplugging high-voltage connectors
L Overview of fitting locations - high-voltage wires, charging unit,
high-voltage battery, charging socket
L Overview of fitting locations - high-voltage wiring, electric drive control
units, high-voltage battery
L Overview of fitting locations - high-voltage wires, voltage converter,
high-voltage heater, air conditioner compressor, rear-wheel drive
L Removing and installing high-voltage wiring harness for power and control
electronics for electric drive
L Removing and installing high-voltage wiring harness for high-voltage heater
L Removing and installing high-voltage wiring harness for voltage converter,
high-voltage heater, air conditioner compressor
L Unplugging high-voltage connectors
L Electrical system
L Assembly overview - control unit with display unit for driver information
system
L Removing and installing control unit with display unit for driver
information system [J1254]
L Removing and installing control unit for head-up display [J898]
L Calibrating control unit for head-up display [J898]
L Assembly overview - windscreen wiper system
L Removing and installing wiper blade
L Removing and installing wiper arms
L Adjusting wiper arms
L Removing and installing wiper motor [V]
L Removing and installing rain and light sensor [G397]
L Assembly overview - windscreen washer system
L Removing and installing washer fluid reservoir
L Removing and installing washer jets
L Assembly overview - rear window wiper system
L Removing and installing wiper arm
L Removing and installing rear window wiper motor [V12]
L Assembly overview - rear window washer system
L Removing and installing spray jet
L Assembly overview - headlight, ECO
L Assembly overview - headlight, Performance
L Removing and installing headlight
L Removing and installing front turn signal bulb [M5]/[M7], ECO headlights
L Removing and installing headlight range control motor [V48]/[V49], ECO
headlights
L Removing and installing headlight range control motor [V48]/[V49],
Performance headlights
L Removing and installing LED module for daytime running light and side light
[L176]/[L177]
L Removing and installing bulb for VARILIS headlight [L207]/[L208]
L Removing and installing headlight fan [V407]/[V408]
L Removing and installing output module 1 for LED headlight [A27]/[A31]
L Removing and installing LED module for daytime running lights [L377]/[L378]
L Removing and installing turn signal repeater bulb [L131]/[L132]
L Removing and installing entry light in exterior mirror [W52]/[W53]
L Assembly overview - tail light cluster on body
L Removing and installing centre rear tail light cluster [MX13]
L Removing and installing tail light cluster [MX3]/[MX4]
L Overview of fitting locations - entry and start authorisation system
L Overview of fitting locations - keyless entry system
L Removing and installing entry and start authorisation control unit [J518]
L Removing and installing entry and start authorisation aerials
L Removing and installing luggage compartment aerial for entry and start
system [R137]
L Removing and installing control unit for mobile-controlled entry and start
authorisation
system [J1308] ID4
L Alcohol interlock
L Breath-alcohol-controlled immobiliser - routing and connecting wires
L Commissioning breath-alcohol-controlled
immobiliser
L Assembly overview - steering column switch module
L Removing and installing steering column electronics control unit [J527]
L Overview of fitting locations - lights in dash panel
L Overview of fitting locations - lights in front doors
L Overview of fitting locations -lights in roof trim
L Removing and installing footwell/luggage compartment light
L Removing and installing dynamic light strip 3 for information in dash panel
[L385]
L Overview of fitting locations - controls in dash panel
L Overview of fitting locations - controls in front doors
L Overview of fitting locations - controls in rear doors
L Overview of fitting locations - controls in luggage compartment
L Overview of fitting locations - controls in roof trim
L Removing and installing operating unit for lighting [EX59]
L Removing and installing operating unit for window regulator in driver door
[EX36]
L Removing and installing rear lid remote release button [E233]
L Removing and installing towing bracket release button [E754]
L Removing and installing front roof module [WX3]
L Removing and installing rear interior light/reading light
L Assembly overview - interior monitor
L Removing and installing anti-theft alarm sensor [G578]
L Overview of fitting locations - relay carriers, fuse carriers
L Assembly overview- relay carriers, fuse holders, electronics boxes
L Removing and installing fuse holder A [SA]
L Removing and installing fuse holder B [SB]
L Removing and installing fuse holder C [SC]
L Overview of fitting locations - control units
L Assembly overview - onboard supply control unit
L Removing and installing onboard supply control unit [J519]
L Removing and installing bracket for onboard supply control unit [J519]
L Removing and installing data bus diagnostic interface [J533]
L Running gear, axles, steering
L Overview of fitting locations - front axle, rear-wheel drive
L Overview of fitting locations - front axle, all-wheel drive
L Assembly overview - subframe
L Removing and installing subframe with steering rack, rear wheel drive
L Removing and installing subframe with motor, all-wheel drive
L Fixing subframe in position
L Preparing scissor-type assembly platform
L Supporting components in vehicle front end
L Renewing front motor mounting, all-wheel drive
L Assembly overview - suspension strut
L Removing and installing suspension strut
L Removing and installing spring
L Assembly overview - suspension link, swivel joint
L Removing and installing suspension link
L Removing and installing swivel joint
L Removing and installing stone deflector for suspension link
L Renewing front suspension link bush
L Renewing suspension link bush, rear
L Assembly overview - wheel bearing assembly, rear-wheel drive
L Removing and installing wheel bearing housing
L Loosening and tightening threaded connections of wheel bearings
L Removing and installing wheel bearing unit, all-wheel drive
L Removing and installing wheel bearing unit, rear-wheel drive
L Assembly overview - drive shaft
L Removing and installing drive shaft
L Loosening and tightening threaded connections of drive shaft
L Removing and installing constant velocity joint
L Tensioning clamp for boot
L Assembly overview - anti-roll bar
L Removing and installing anti-roll bar
L Removing and installing coupling rod
L Overview of fitting locations - rear axle
L Removing and installing rear axle
L Lowering rear axle
L Securing vehicle to support arms of lifting platform
L Assembly overview - subframe mountings
L Assembly overview - subframe
L Fixing subframe in position
L Preparing scissor-type assembly platform
L Taking up weight of subframe using scissor-type assembly platform
L Renewing gearbox/transmission unit mounting
L Renewing motor mountings
L Renewing front subframe mountings
L Renewing rear subframe mountings
L Assembly overview - anti-roll bar
L Removing and installing anti-roll bar
L Removing and installing coupling rod
L Assembly overview - suspension link
L Assembly overview - track rod
L Assembly overview - spring control arm
L Removing and installing track rod
L Removing and installing spring control arm
L Removing and installing lower suspension link
L Removing and installing upper rear suspension link
L Removing and installing upper front suspension link
L Exploded view - shock absorber
L Assembly overview - spring
L Removing and installing shock absorber
L Renewing shock absorber
L Removing and installing spring
L Renewing spring
L Assembly overview - wheel bearing
L Removing and installing wheel bearing housing
L Removing and installing wheel bearing unit
L Raising wheel bearing assembly to unladen position
L Assembly overview - drive shaft
L Removing and installing drive shaft
L Loosening and tightening threaded connections of drive shaft
L Dismantling and assembling drive shaft
L Tensioning clamp for boot, ID.4, ID.5
L Overview of fitting locations - damping control
L Assembly overview - electronically controlled damping control unit
L Removing and installing electronically controlled damping control unit
[J250]
L Removing and installing front body acceleration senders [G341]/[G342]
L Removing and installing rear body acceleration sender [G343]
L Exploded view - front vehicle level senders
L Assembly overview - rear vehicle level senders
L Removing and installing front vehicle level senders [G78]/[G289]
L Removing and installing rear vehicle level senders [G76]/[G77]
L Notes on wheel alignment
L Adjusting camber at front wheels
L Adjusting toe setting at rear wheels
L Checking full steering lock
L Assembly overview - wheel
L Removing and installing wheel
L Cleaning contact surfaces on rim
L Assembly overview - steering wheel
L Removing and installing steering wheel
L Assembly overview - steering column
L Removing and installing steering column
L Removing and installing intermediate steering shaft
L Removing and installing control unit for electronic steering column lock
J764
L Assembly overview - steering rack, left-hand drive
L Assembly overview - steering rack, right-hand drive
L Assembly overview - track rods
L Removing and installing steering rack, all-wheel drive
L Removing and installing steering rack, rear-wheel drive
L Servicing steering rack
L Removing and installing boot
L Removing and installing track rod
L Removing and installing track rod ball joint
Total pages: 1549 (630)






 ID.4 Guide
 ID.4 Guide